The Ultimate Guide to Perfectly Seared Meat: Professional Techniques and Tips

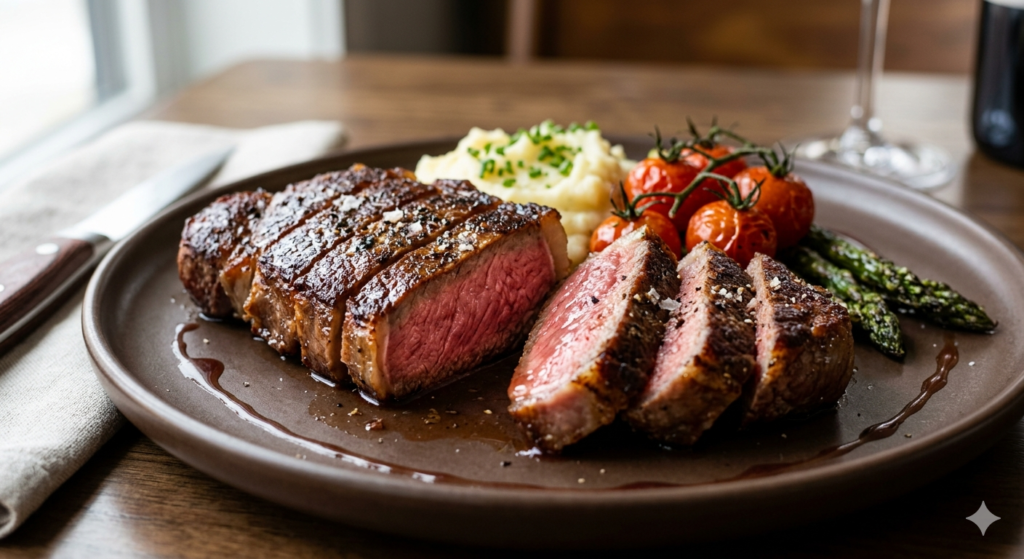
Perfectly seared meat is one of the most satisfying skills you can master in the kitchen. That golden-brown crust, rich aroma, and juicy interior are what separate average cooking from restaurant-quality results.
But here’s the truth: great searing isn’t just about using high heat—it’s about understanding technique, timing, and preparation. Once you learn the fundamentals, you’ll be able to cook steak, chicken, or pork with confidence every time.
Understanding the Science Behind Searing
A perfect sear comes from something called the Maillard reaction—a chemical process that occurs when proteins and sugars in meat are exposed to high heat.
This reaction:
- Creates a deep brown crust
- Develops complex, rich flavors
- Adds texture contrast between crispy outside and juicy inside
Without this process, your meat will taste flat and look pale.
To make the most of this reaction, controlling heat is essential. If you’re not familiar with heat levels in cooking, it’s worth understanding cooking temperature control so you know exactly when your pan is ready.
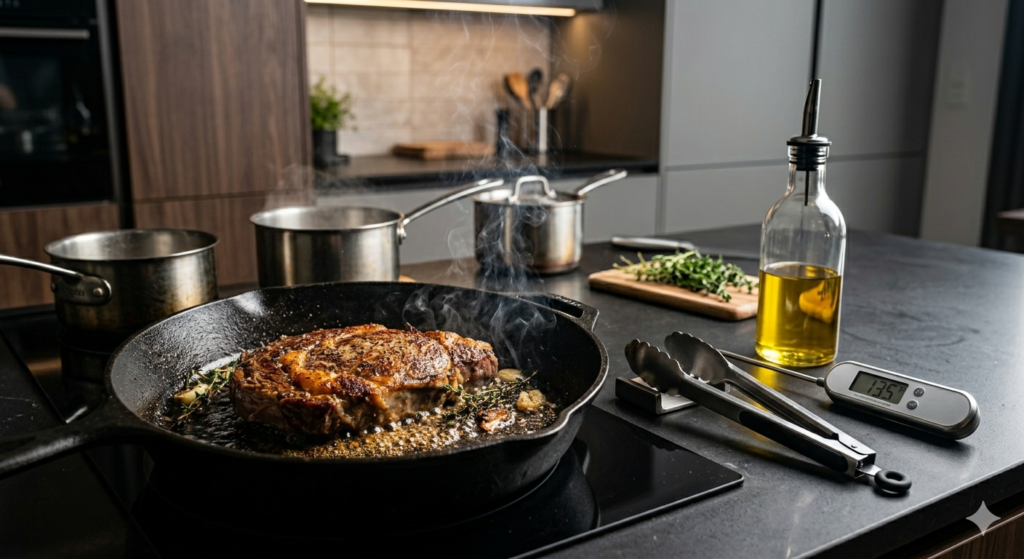
Essential Equipment for Perfect Searing
To get consistent, professional results, your tools matter just as much as your technique.
Must-Have Equipment:
- Heavy-bottomed pan (preferably cast iron)
- Instant-read meat thermometer
- Metal tongs (avoid forks)
- Paper towels
- High smoke-point oil
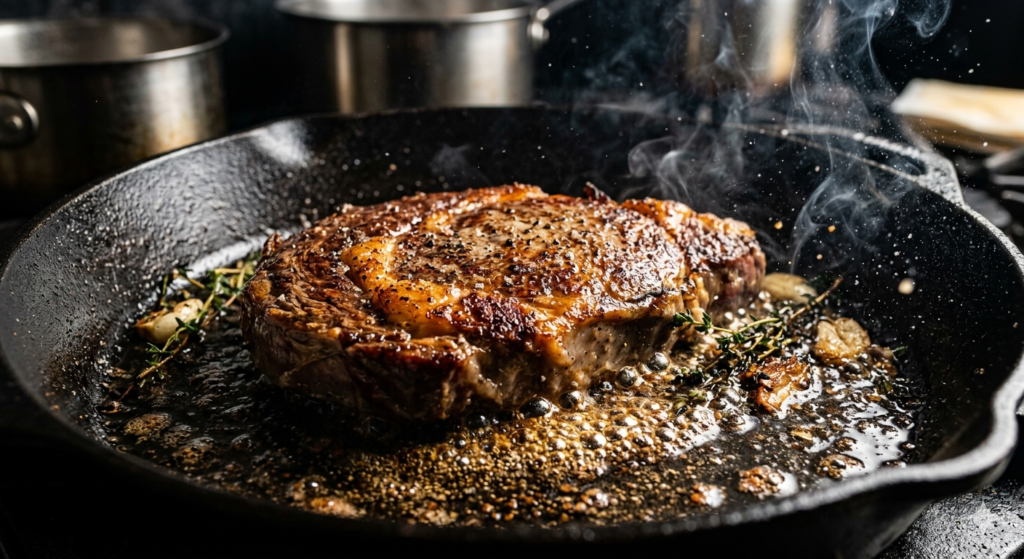
Cast-iron skillets are ideal because they retain heat extremely well, which is crucial for achieving a proper sear.
If you’re building your kitchen setup, combining the right tools with proper organization techniques like mise en place will make your cooking much more efficient.
Step-by-Step Searing Process
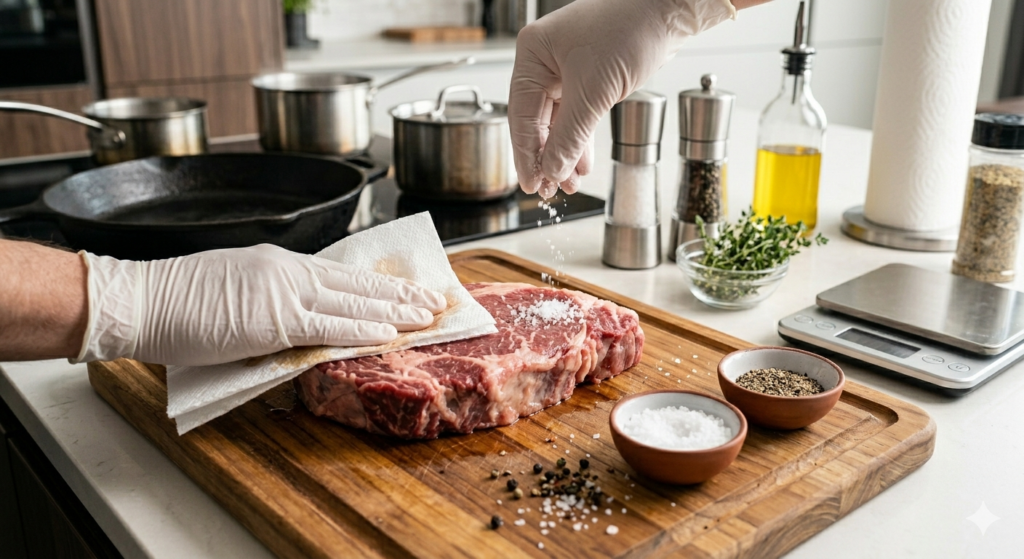
1. Preparation
Start by bringing your meat to room temperature. Let it sit out for 30–60 minutes depending on thickness.
Then:
- Pat the meat completely dry
- Season generously with salt and pepper
Moisture is the enemy of a good sear. If the surface is wet, the meat will steam instead of forming a crust.
2. Heat Management
Heat your pan over medium-high heat until it’s properly hot.
A simple test:
- Add a drop of water → it should sizzle and move quickly
Add a thin layer of oil with a high smoke point (like avocado or vegetable oil).
Understanding the difference between heat levels—like simmering vs high heat—can dramatically improve your results. Learning boiling and simmering temperatures helps you control heat more precisely.
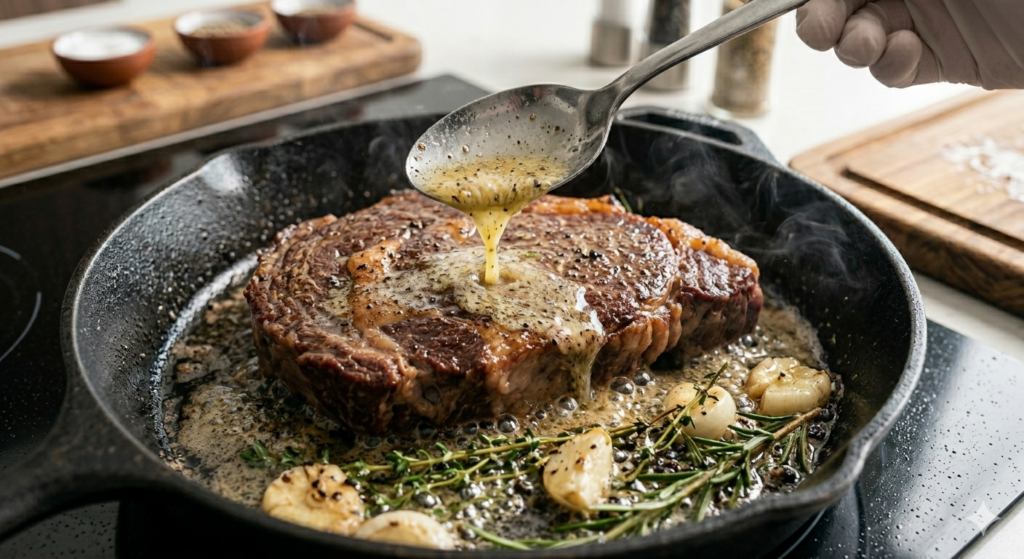
3. The Searing Technique
Place your meat in the pan and don’t move it.
This is where most beginners go wrong.
For best results:
- Leave space between pieces
- Sear 3–5 minutes per side
- Flip only once using tongs
- Press gently for full contact
Optional: Add butter, garlic, and herbs near the end for extra flavor.
If you’re still building confidence in the kitchen, mastering basics from how to cook properly will help you apply these techniques more effectively.
Common Mistakes to Avoid
Even small mistakes can ruin a good sear. Here’s what to watch out for:
❌ Overcrowding the Pan
Leads to steaming instead of searing
❌ Constant Flipping
Prevents crust formation
❌ Wet Meat
Stops the Maillard reaction
❌ Wrong Oil
Low smoke point oils burn quickly
These mistakes often come down to a lack of preparation. Using a structured approach like mise en place can help you avoid these issues entirely.
Advanced Searing Techniques
Once you’ve mastered the basics, try these professional-level methods.
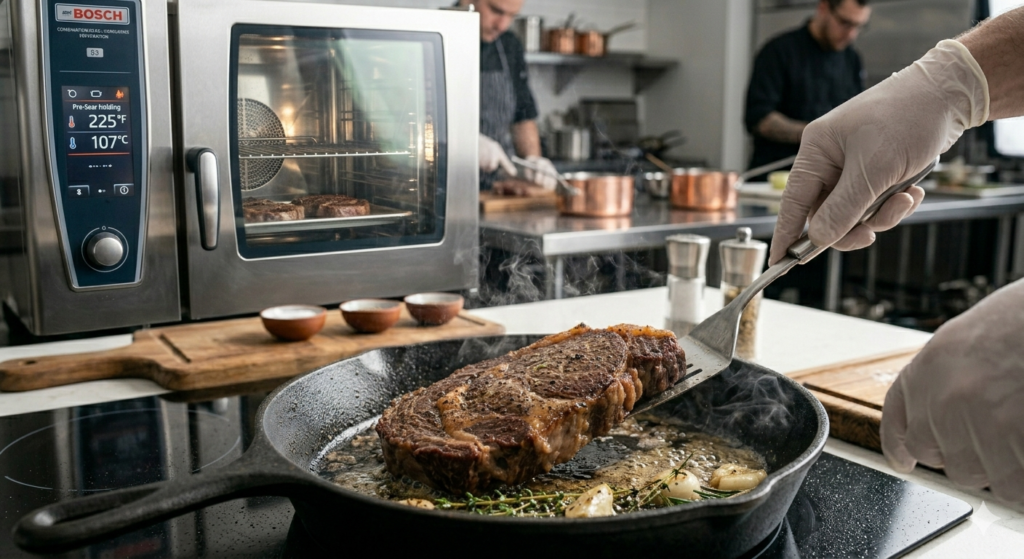
Reverse Searing
This method involves:
- Cooking meat slowly in the oven
- Finishing with a high-heat sear
Benefits:
- Even cooking
- Better control
- Perfect crust
Great for thick steaks.
The Cold Oil Method
Some chefs start with cold oil and gradually heat the pan.
This method:
- Gives more control
- Reduces splatter
- Works well for delicate meats
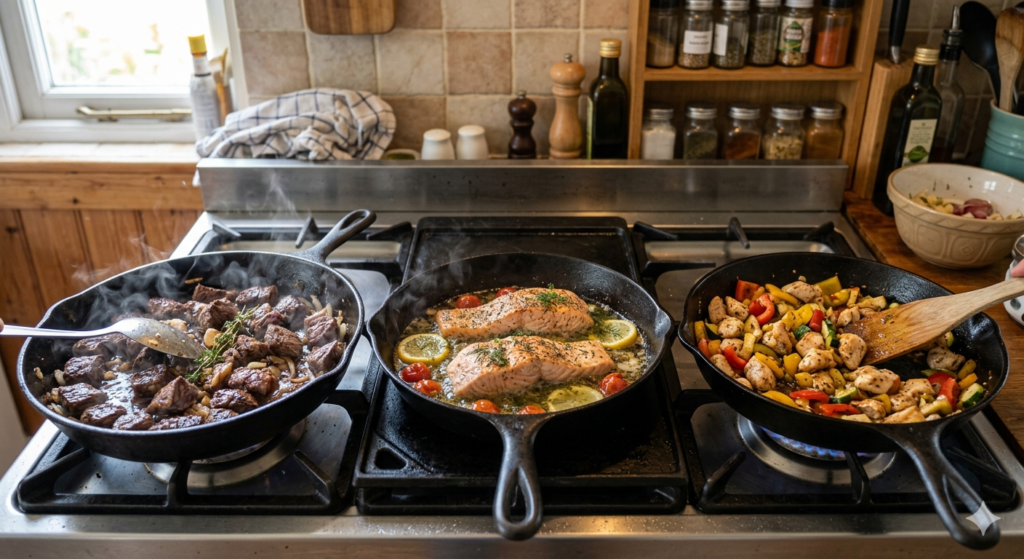
Tips for Different Types of Meat
Beef
- Best cuts: ribeye, strip steak, filet mignon
- Temperature: high heat (400–450°F)
- Rest after cooking for 5–10 minutes
Fish
- Best cuts: fillets (salmon, cod, halibut), steaks (tuna, swordfish)
- Temperature: medium to medium-high heat
- Pat dry well and start skin-side down for a crispy texture; avoid overcooking as fish cooks quickly and can dry out easily
Chicken
- Best cuts: breasts, thighs
- Medium heat
- Internal temp: 165°F
Using a thermometer ensures accuracy and prevents overcooking. If you’re still learning precision in cooking, understanding how to measure ingredients accurately helps build similar control skills.
Pro Tips for Perfect Results
- Always preheat your pan
- Use high-quality meat
- Let the meat rest after cooking
- Don’t rush the process
Great cooking comes from patience and consistency. Just like knife skills, improving techniques such as knife sharpening ensures better results in preparation and cooking.
Learn More from Experts
If you want to deepen your understanding of searing techniques, read this detailed guide on perfect pan-seared steaks from Serious Eats.
Conclusion
Mastering the art of searing meat is one of the fastest ways to improve your cooking. With the right heat, proper preparation, and a little patience, you can achieve restaurant-quality results at home.
Focus on the fundamentals, avoid common mistakes, and practice regularly. Over time, you’ll develop the confidence to cook any type of meat perfectly.
Next Steps
To continue improving your skills:
- Practice different cuts of meat
- Learn sauce-making for pan finishes
- Improve heat control techniques
- Build strong kitchen habits
Once you master searing, you’ll unlock a whole new level of cooking confidence.